You will first be learning how to solve the edges of the first layer on the cube.
A good thing to know whilst solving the cube is that the centers never move, so dont worry about solving those.
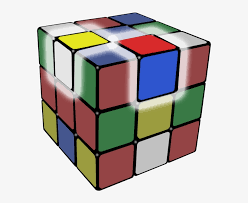
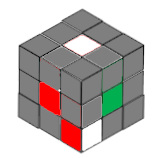
These highlighted pieces are the Edges of the Rubik's Cube
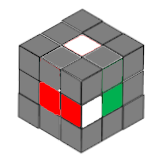
This red and white piece is an edge piece in the wrong place, and we have to turn the left face so that the white and red is aligned with the white and red centers.
So far this is quite simple, and we dont need any algorithm to understand the first layer.
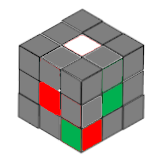
but later in the tutorial we will need them. But the motion you will want to do here is a L' to align the edge piece with the center pieces.
This is what your cube should look like. (the White Cross)
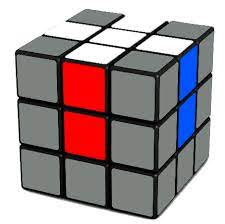
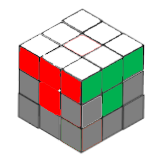
This corner piece is what we will be working on next
We will want to get the corner pieces in a position like it is shown in this picture,
In this picture the corner piece is in the wrong place, now it looks easy to get it in from this picture. But since you have done the edge pieces you have to keep those whilst adding this corner piece on. A way we can do this is with an algorithm.
Whilst doing this algorithm you need to know that the Green face is the F face and the white face is the U face.
First you need to move the green face Anti-Clockwise (F').
Then move the Downward face Anti-Clockwise (D').
Lastly you move the Green face Clockwise (F).
The white face of this corner piece is pointing down so we cant do the method that has just been shown above.
Now we will learn how to move it into a position where we can do the previous algorithm.
Move the green face Counter-Clockwise (F')
Move the downward face clockwise (D)
Move the front face Clockwise (F)
Move the downward face clockwise twice (DD).
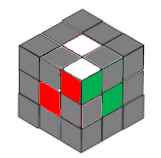
Once we have done that it should look like the picture above.
Congratulations! You should have now got the First Layer solved and are ready for the 2nd layer.